Edit Site Page
This page is responsible for editing site’s information displayed in Site Info page, including:
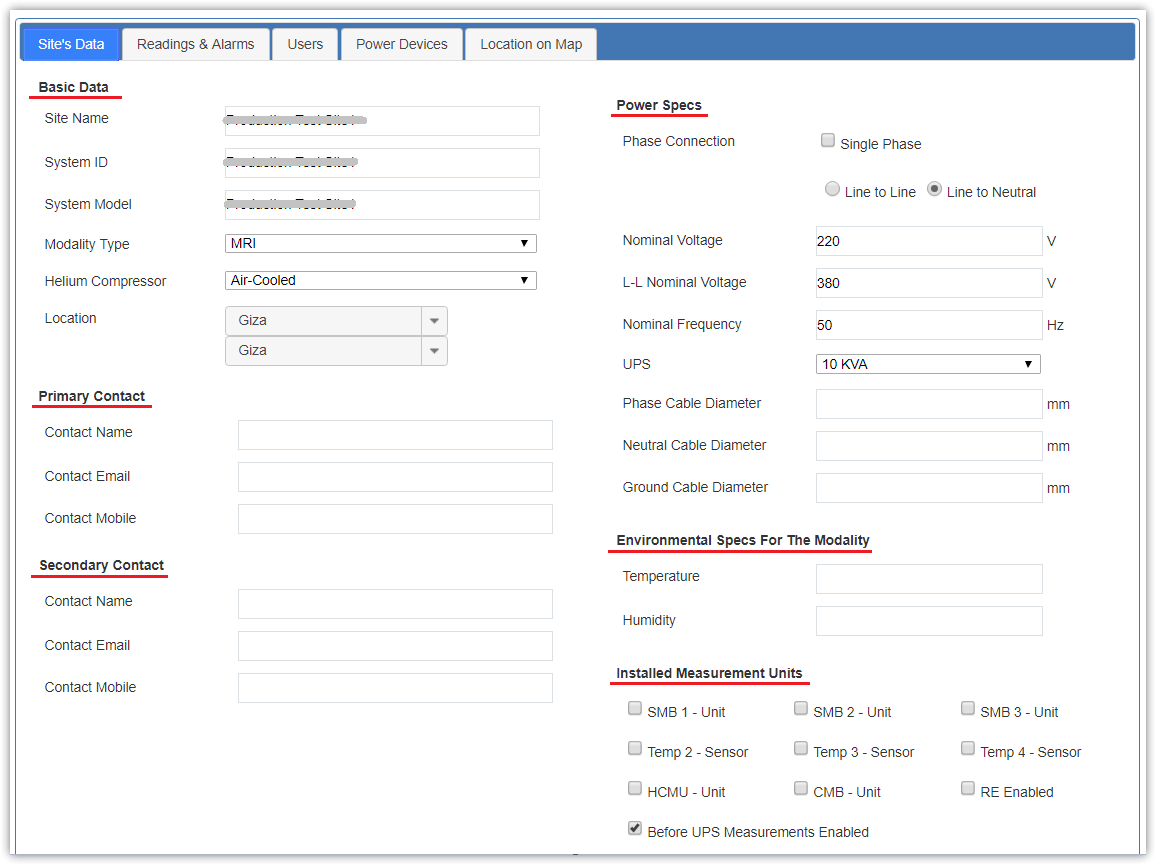
Edit Site’s Data
|
L-L Nominal Voltage field shall be displayed only in case of Three phase, L-N connection. |

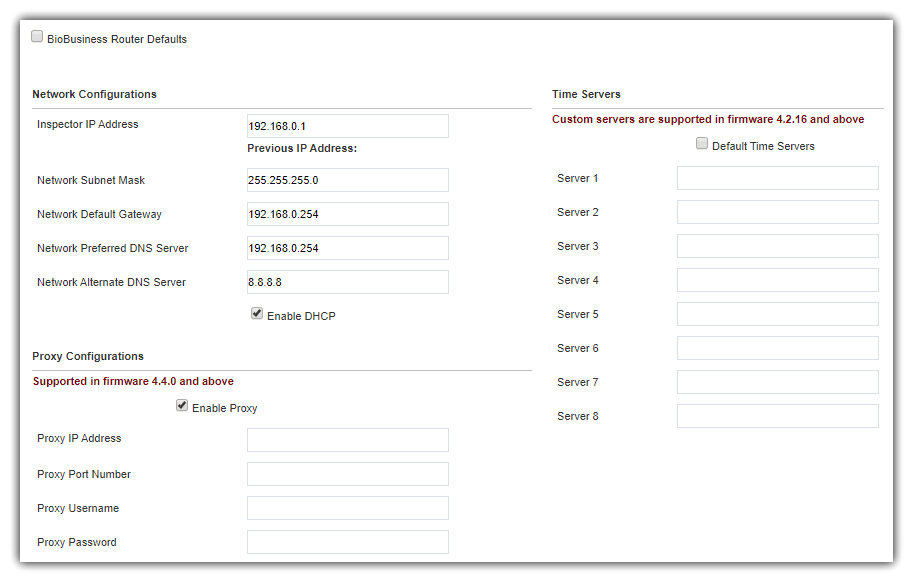
- Edit Network Configurations, Time Servers and Proxy Configurations
|
Custom time servers are only supported with Firmware Version 4.2.16 and versions above this. |

|
Proxy configurations are supported with Firmware Version 4.4.0 and versions above this. |
|
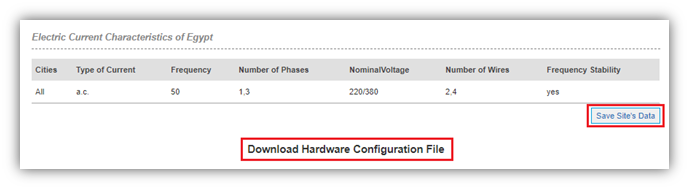
Changing network configurations doesn't reflect remotely. You should re-download a new configuration file, and update the device. |
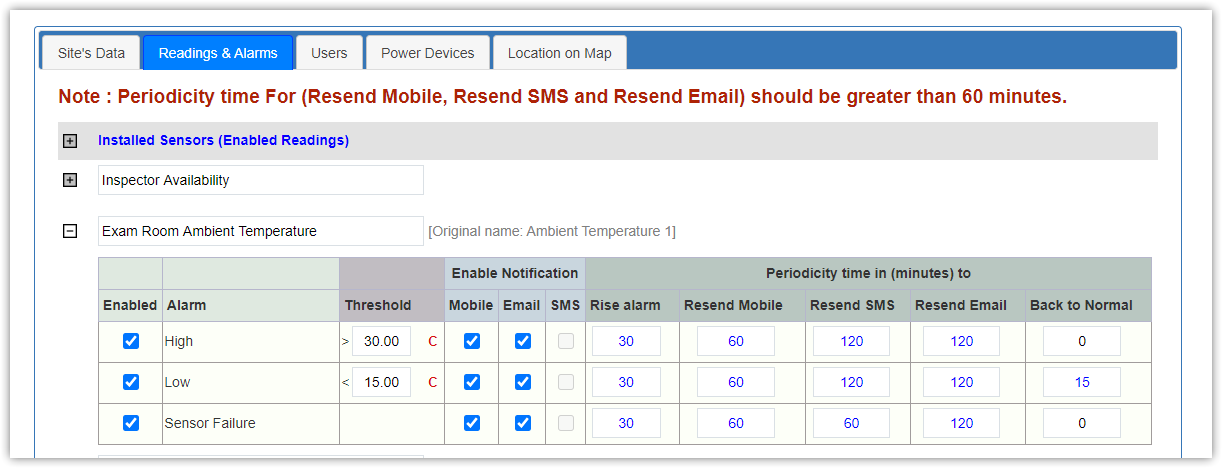
Edit Readings & Alarms
- All checked/activated parameters are displayed in Current Readings page and notifications are sent by,
and deactivated parameters are hidden in Current Readings page, and Site Info page as well
- Alarms of deactivated parameters are automatically disabled for the site
- Authorized users can rename environmental parameters with friendly names refer to where sensor is installed:
- Parameters you are allowed to edit, will appear as text fields (Ambient Temperature 1 > Exam Room Ambient Temperature)
- Original name of parameters, is displayed along with the new one
- Custom parameters names will reflect on alarms notification, and related pages
- New parameter name will not affect on alarms history in the interval before renaming
- Periodicity time is responsible for time settings of re-sending alarms notifications and should be greater than 60 minutes,
and back to normal field represents closing alarms after selected interval
- Configuration doesn't affect till user saves data
For more information about alarms behavior and custom conditions, check Alarms Service Process chapter.
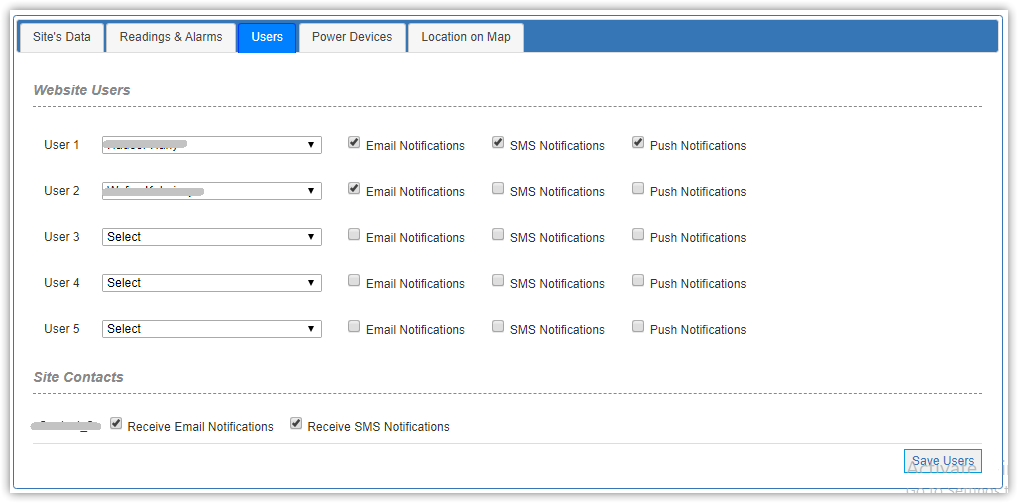
Edit Users
To add/select users to be responsible for receiving notifications for this site.
- Website Users are the users added on website in Manage Users page
- Sites Contacts are the contacts set in Site's Data tab (primary and secondary) contacts
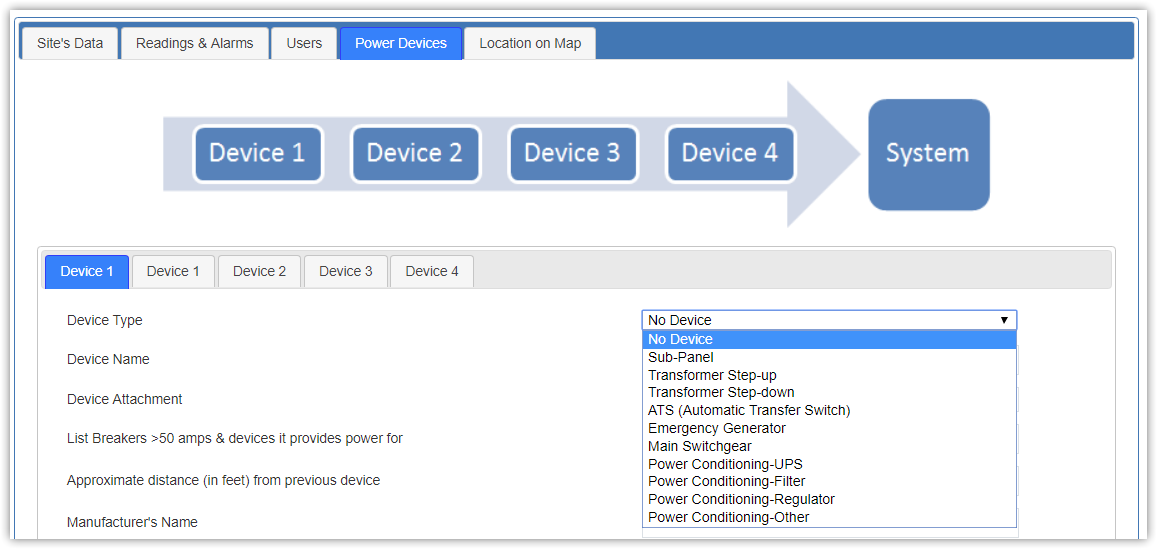
Edit Power Devices
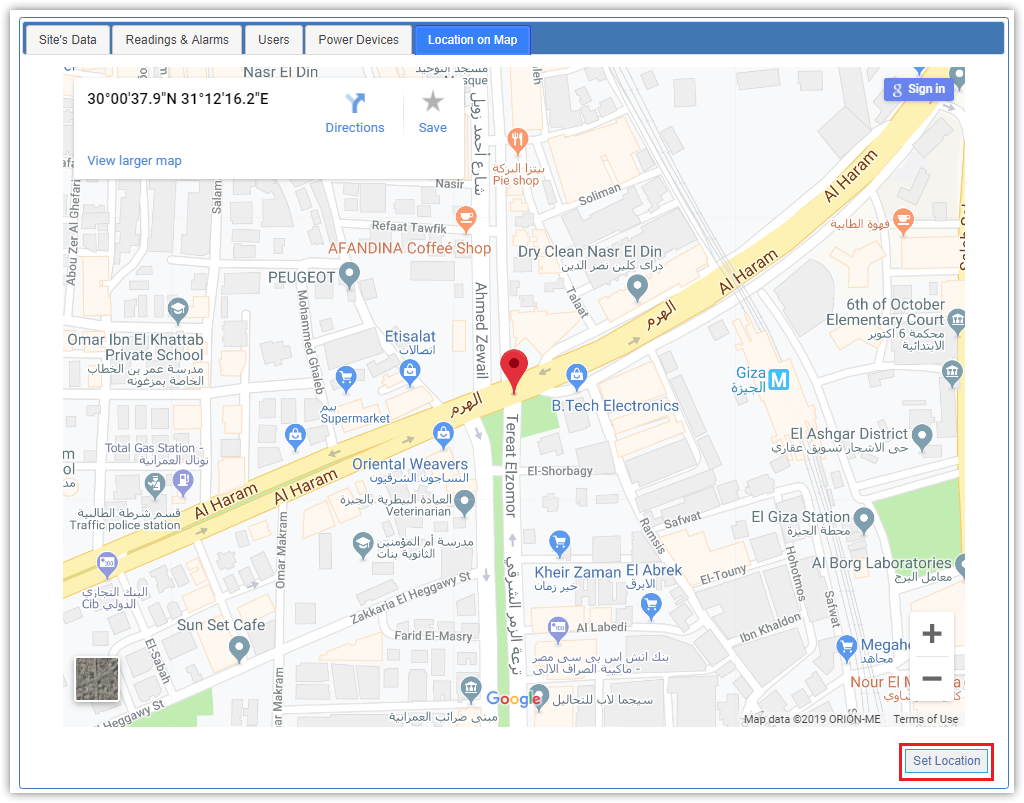
Edit Location
- Click Set Location button.
- Navigate to Pick Site Location page and select your new location.
- Click Confirm Location button.
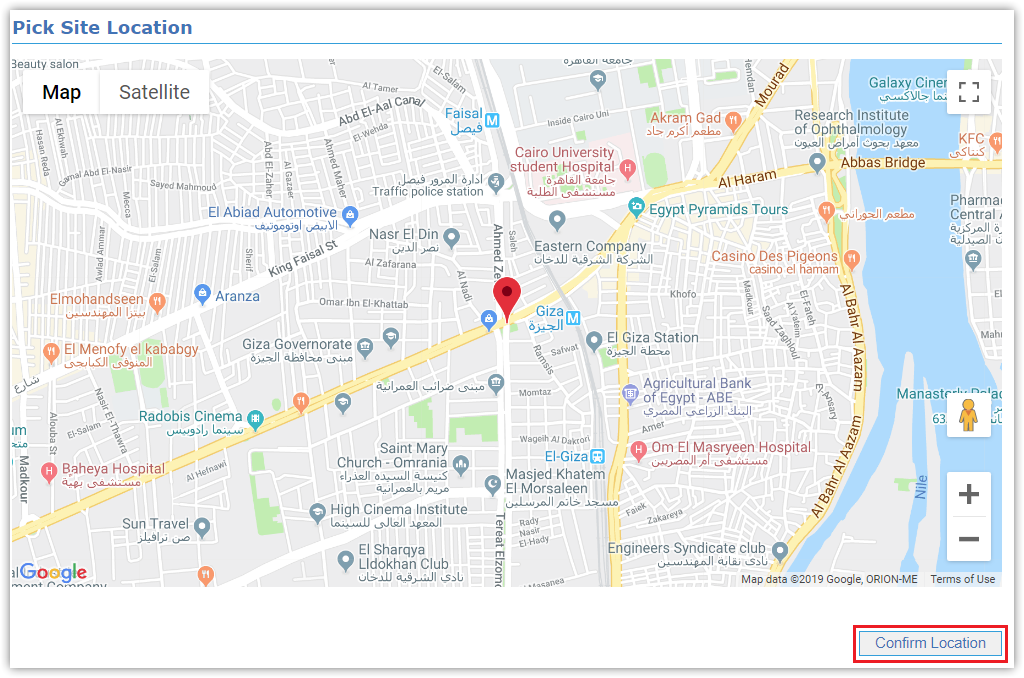
- In case of site does NOT have location set yet, just click Set Location button,
and then navigate to Pick Site Location above to set and confirm your location
